Bending Space and Light to See the Unimaginable
I was doing some experimentation with transforming an image. In this case, I found a simple photo of light shining through some blinds onto my kitchen floor to be interesting – but not that interesting. However I thought that there might be something there, so I played around with the image on my phone, primarily manipulating it in various ways using the Tiny Planet app. I came up with a variety of compositions that I think are quite intriguing.

And visual variations after different digital manipulations:


I like the way these camera apps can let me see differently, to envision compositions that I couldn’t have imagined and which could be quite successful as references or inspiration for paintings.
Old But Not That Old
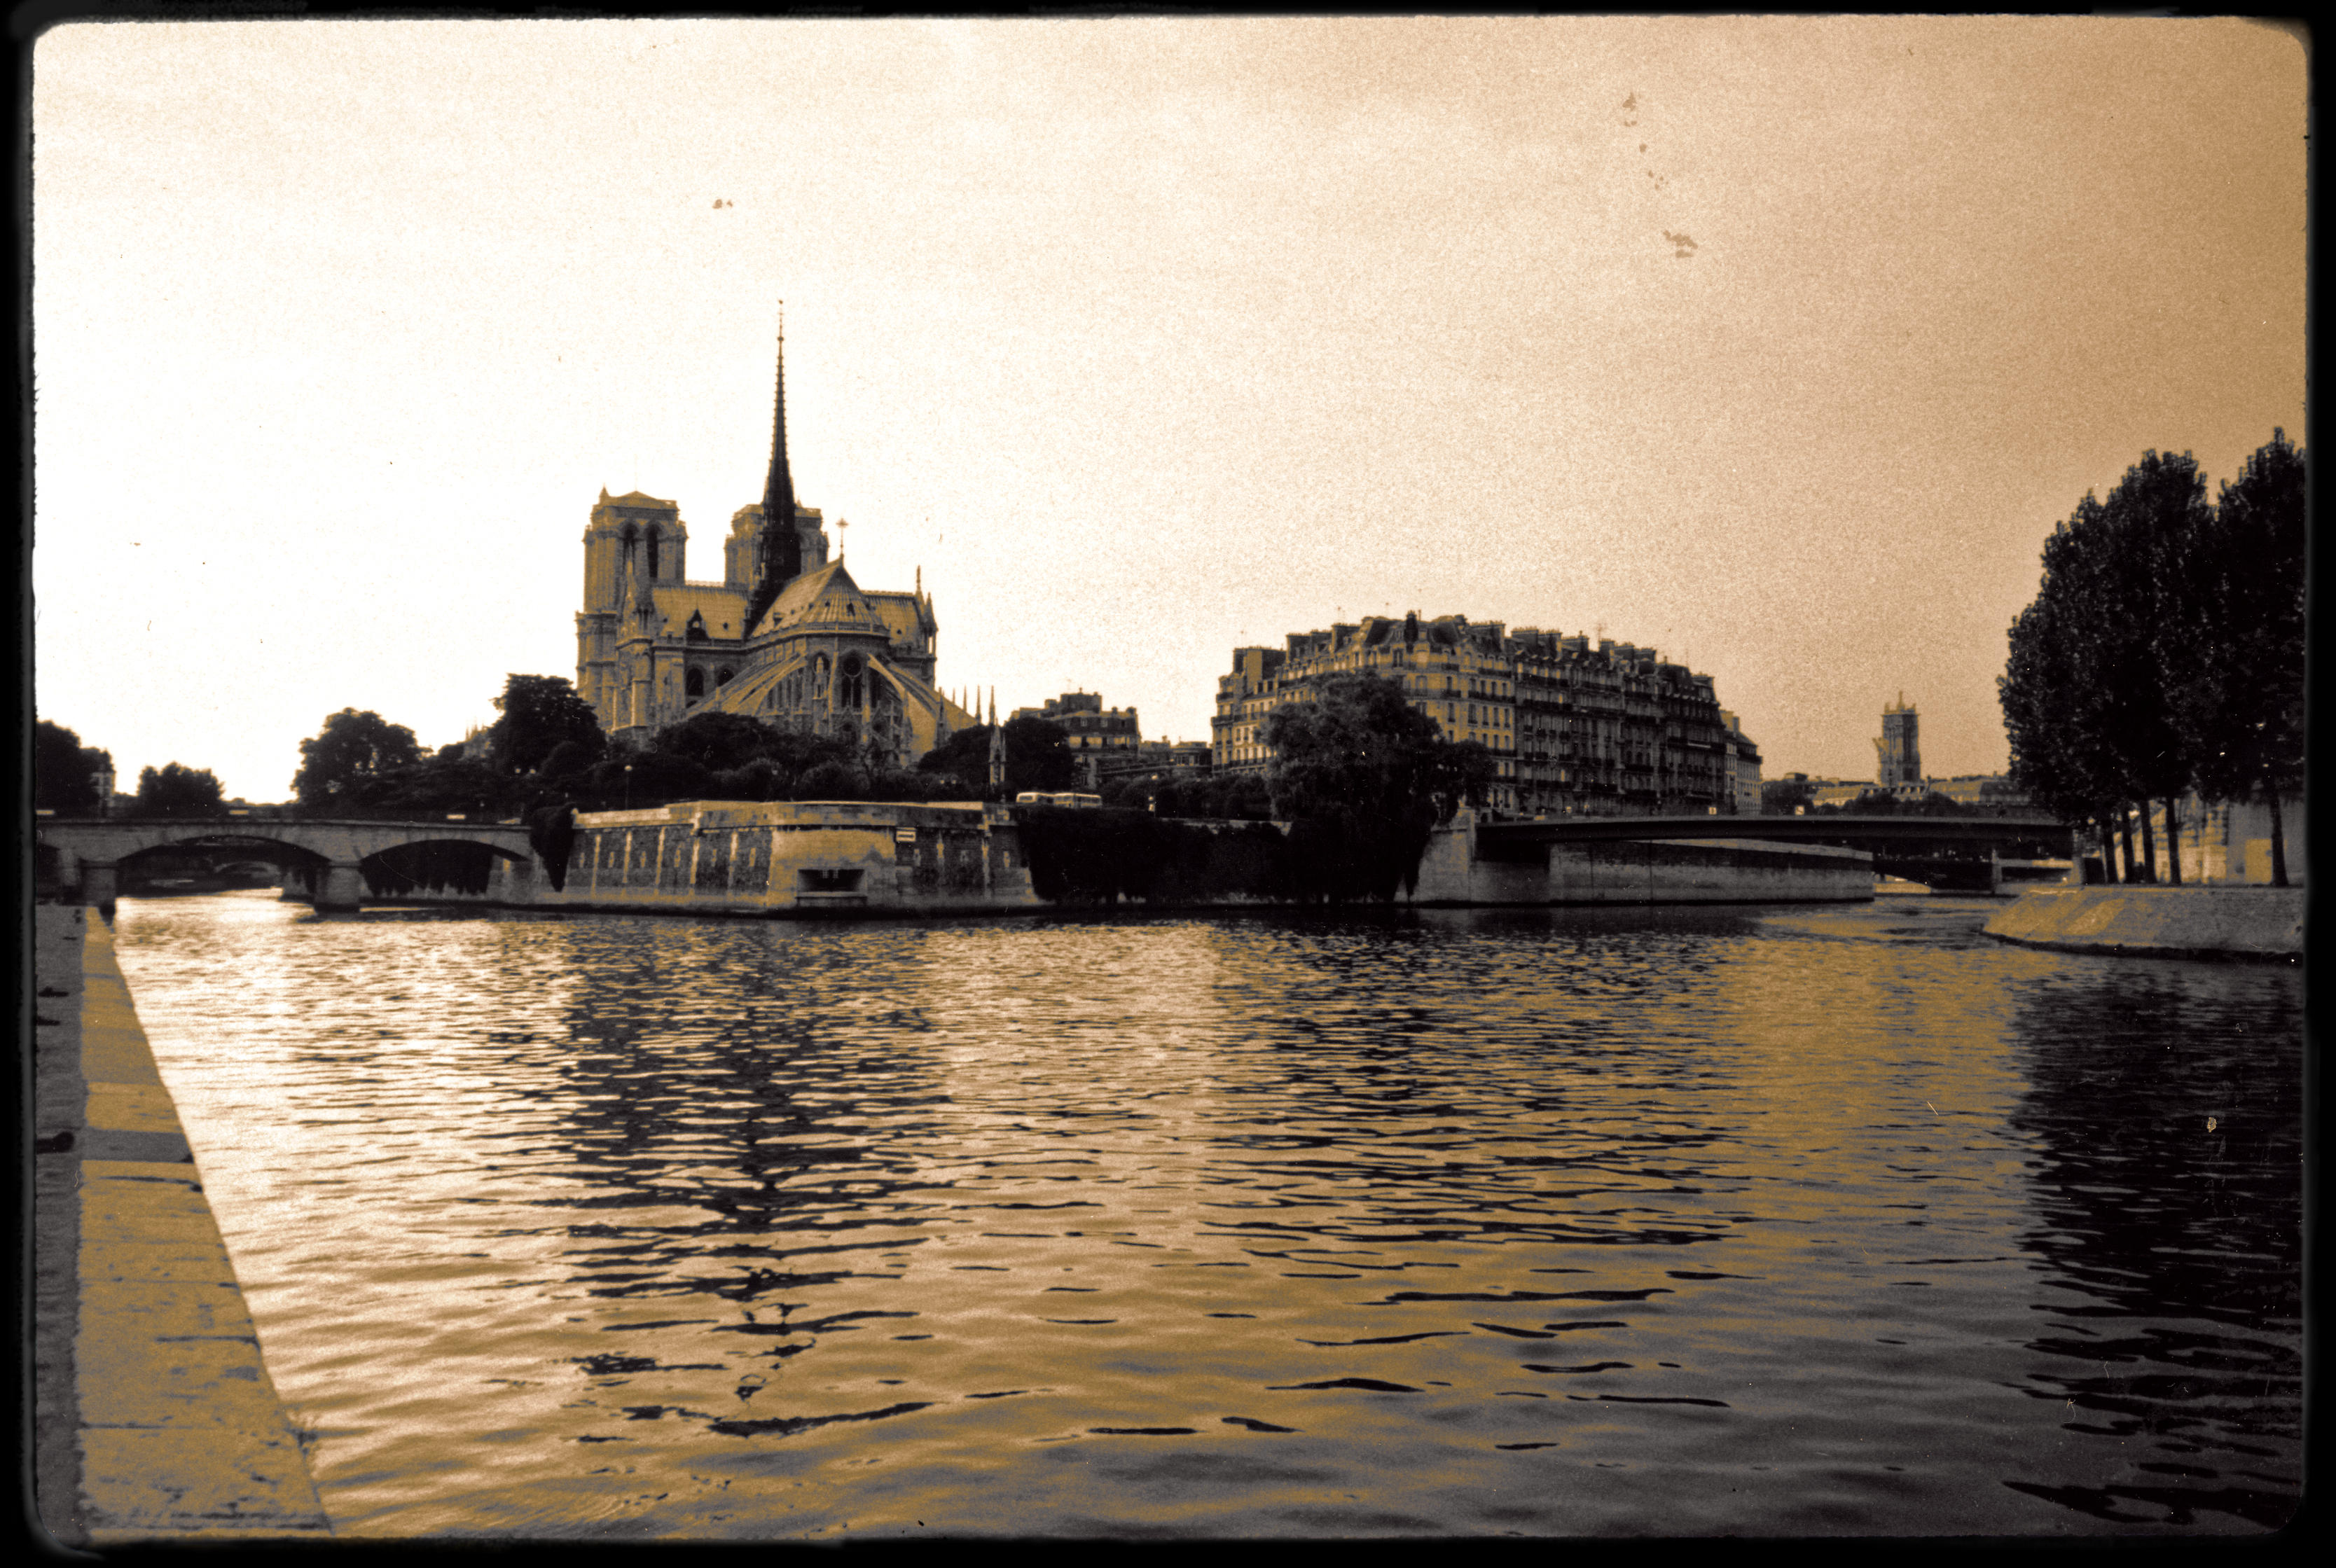
I’ve recently been experimenting with software that simulates the look of photos created through the history of photography. The software that I am using is DxO’s FilmPack 6 (FP6). Among the historical looks that appeal to me and that I have been applying to some of my photos, are the style of the early 1900’s and especially that of Eugene Atget, a French photographer.
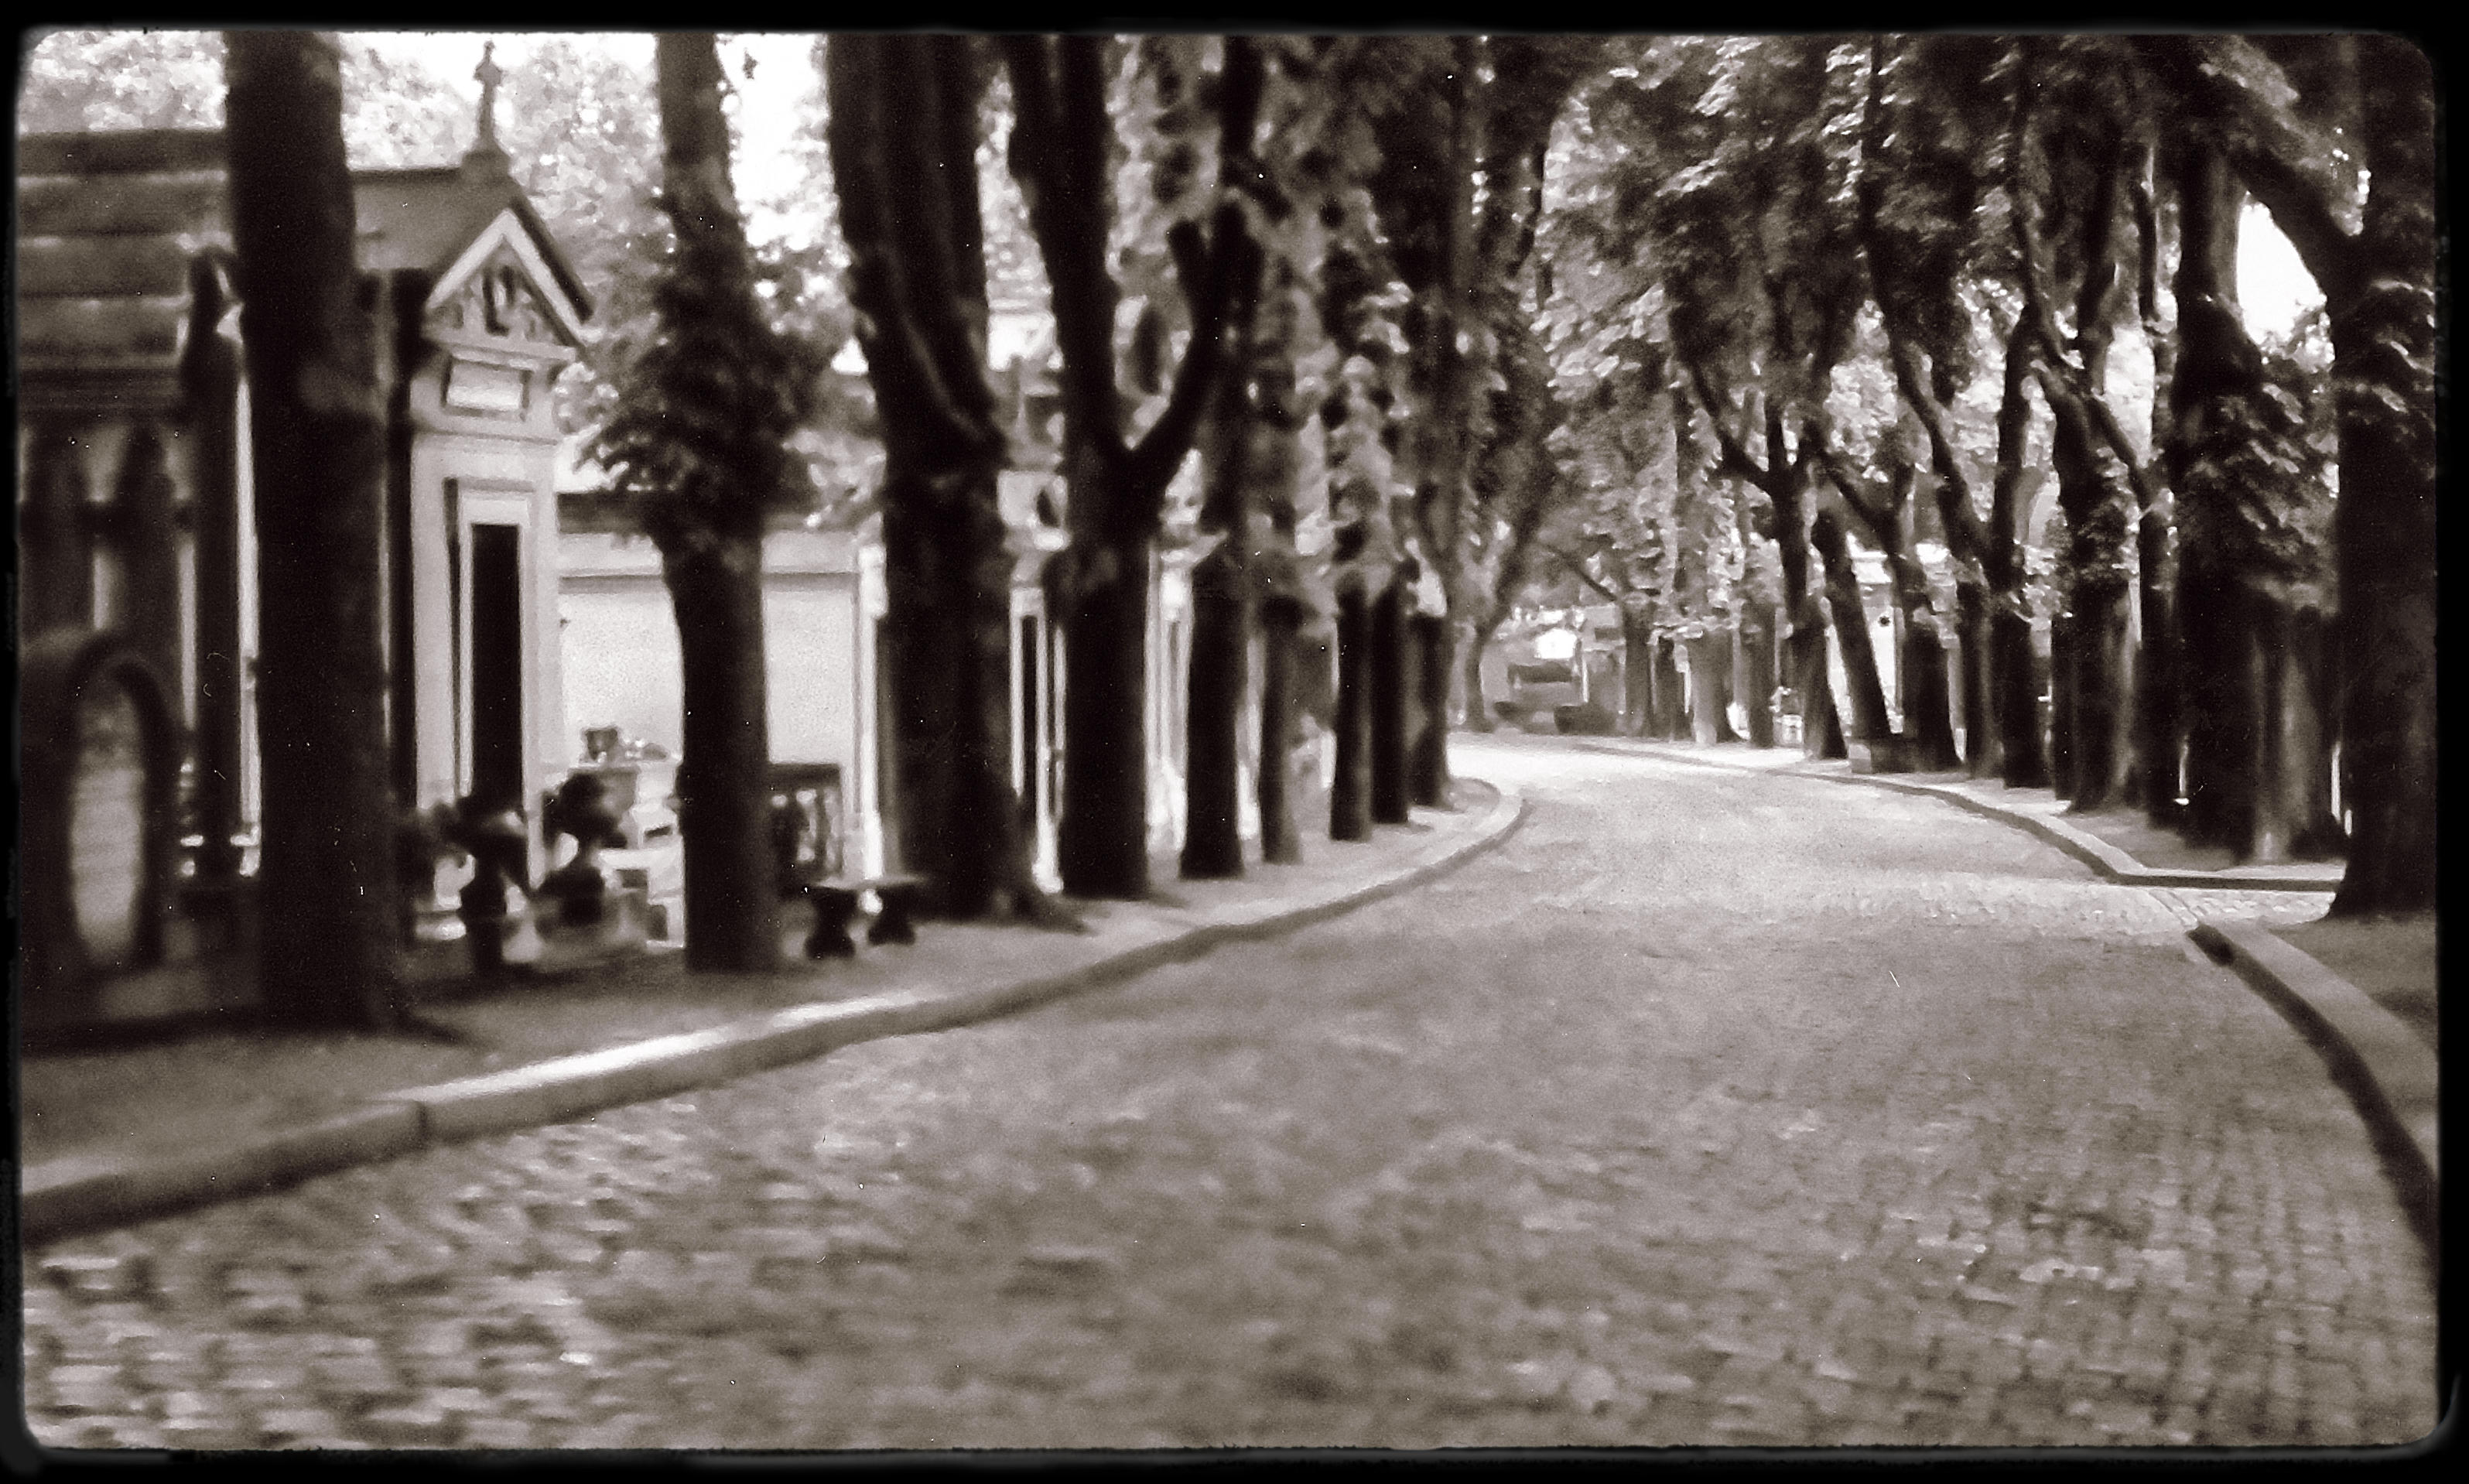
I thought that some of my photos, taken in the 80’s, in Paris, might be particularly suited to the historical treatment. My photos from that time were obviously taken on film and I subsequently scanned and digitized them, so they lost some of the detail in the process but given the limits of film and processing from a hundred years ago I think that only adds to the authenticity of the look. Here are two of my photos software-adjusted to simulate the look of photos from around the year 1900:
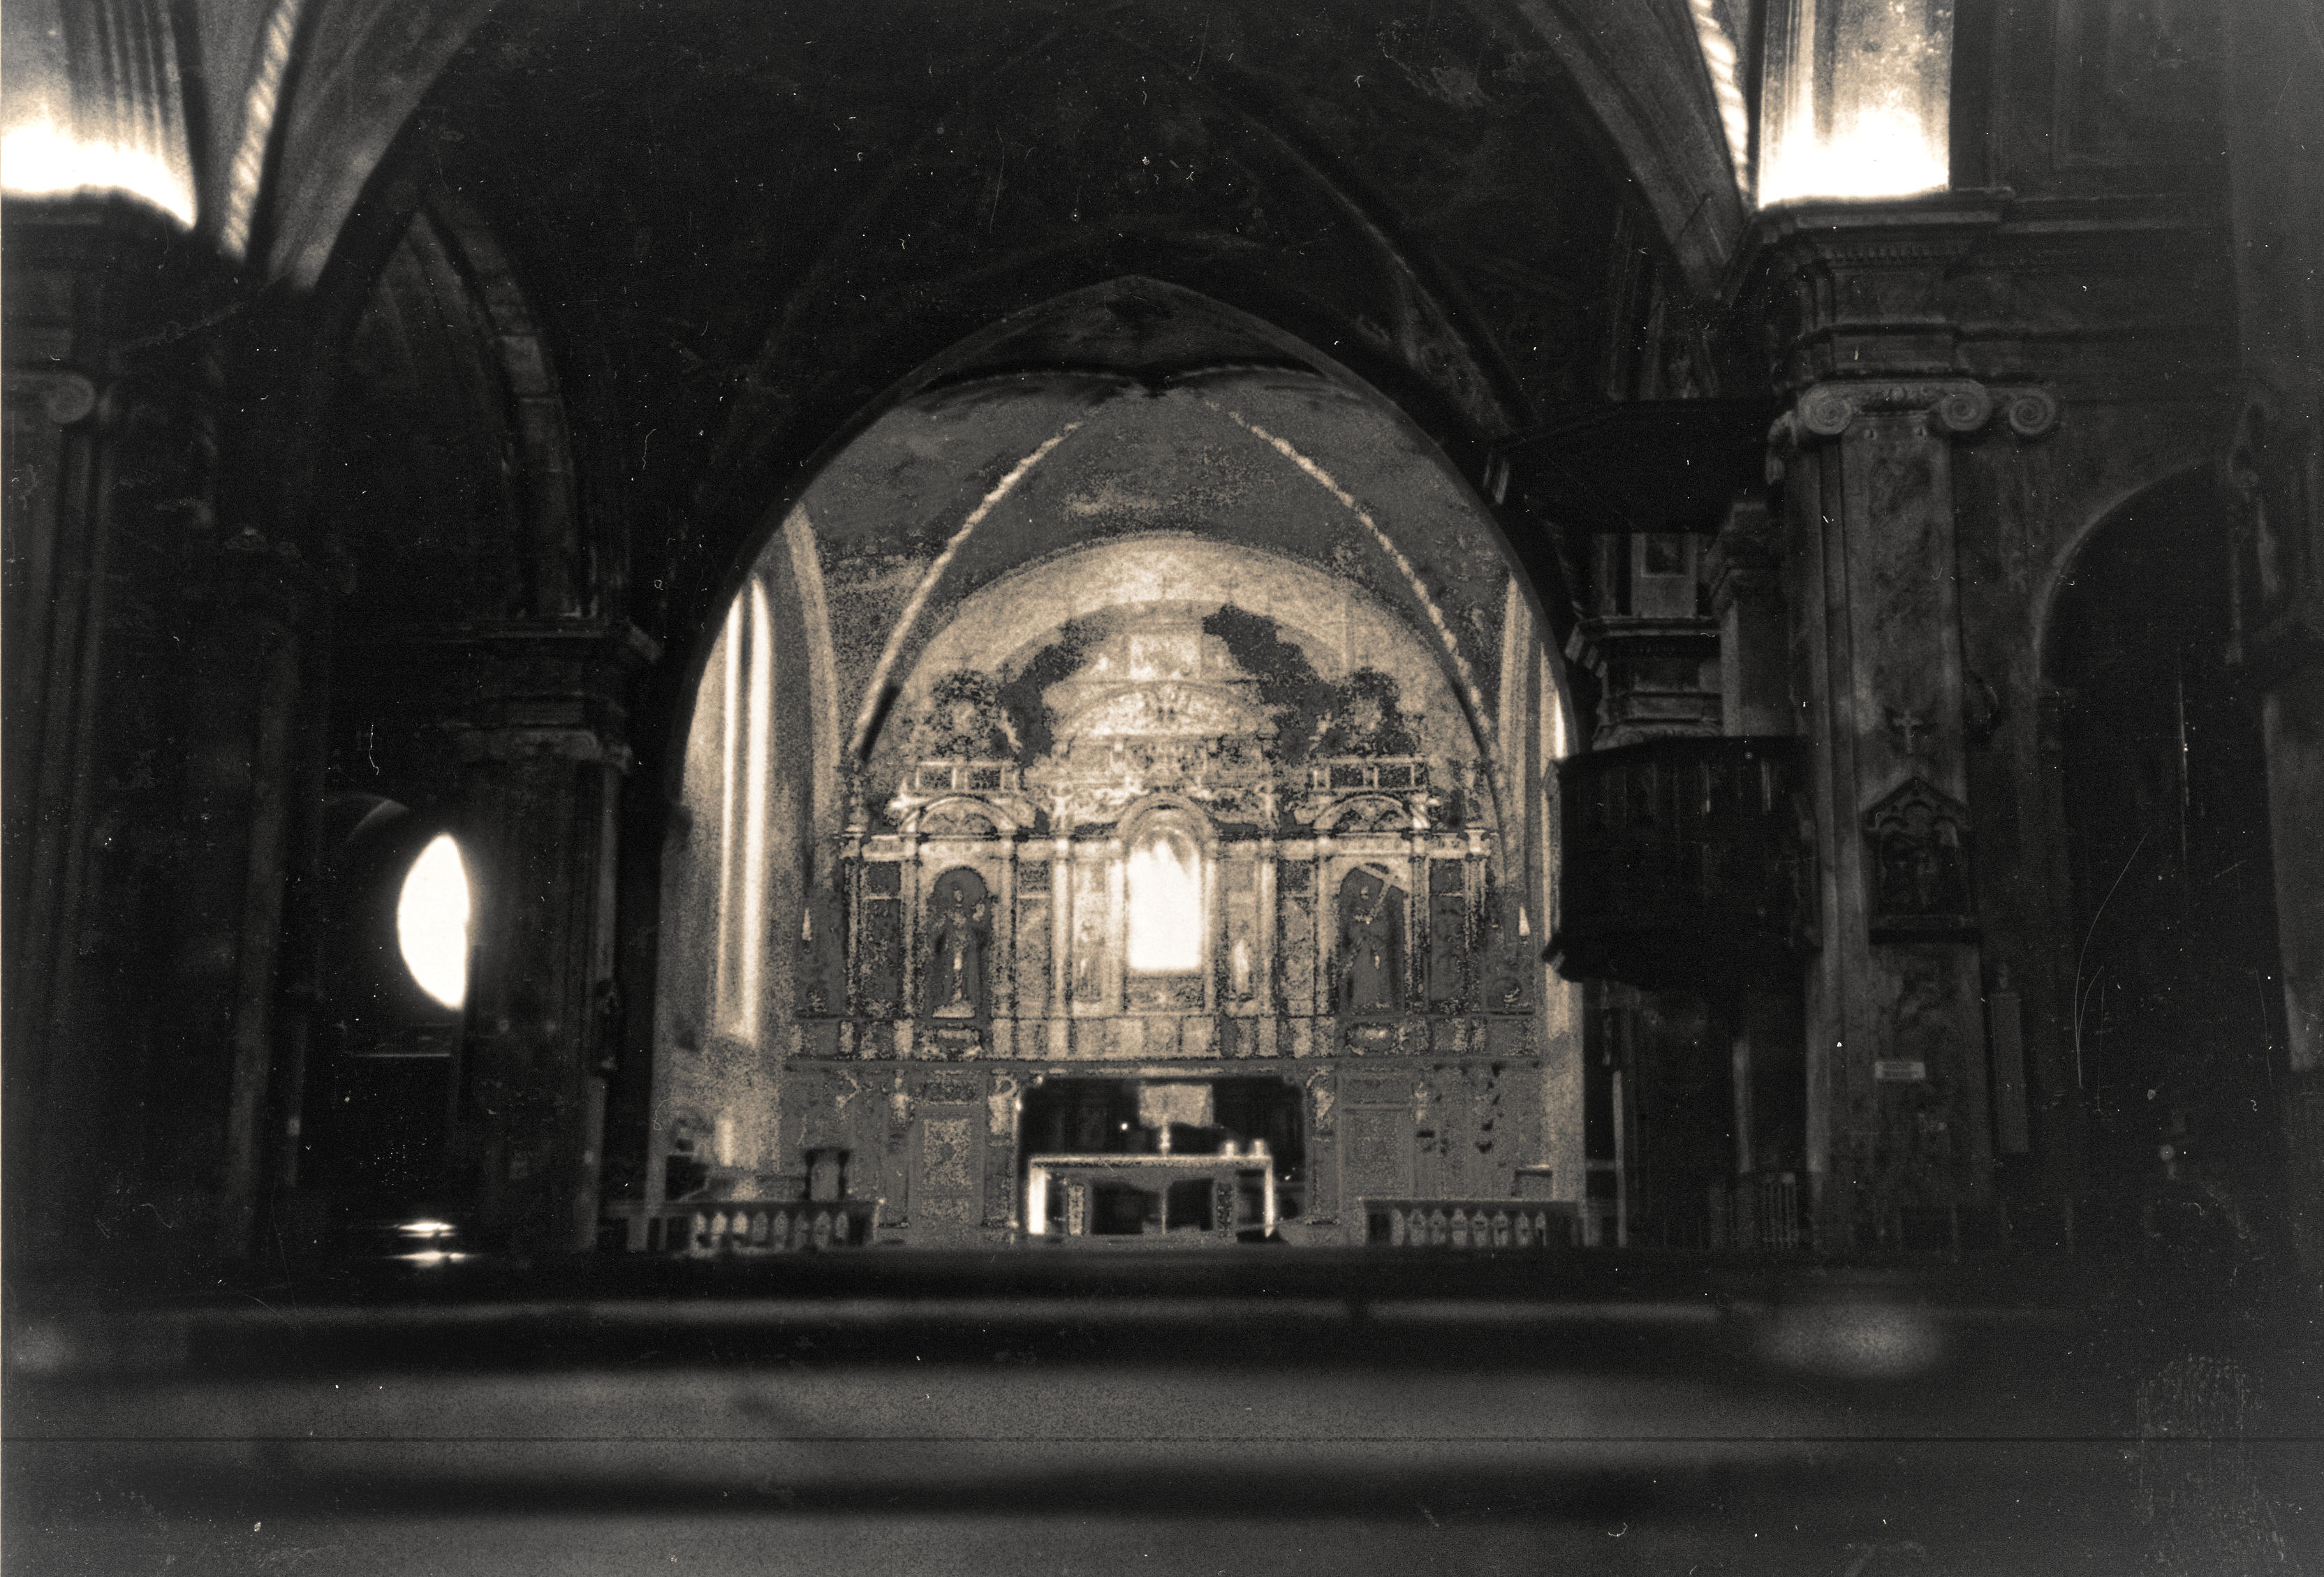

Here are photos that I took in 1984 at Paris’s Père-Lachaise Cemetery. These are intended to look like something Atget may have captured in the first couple of decades of the 1900’s:


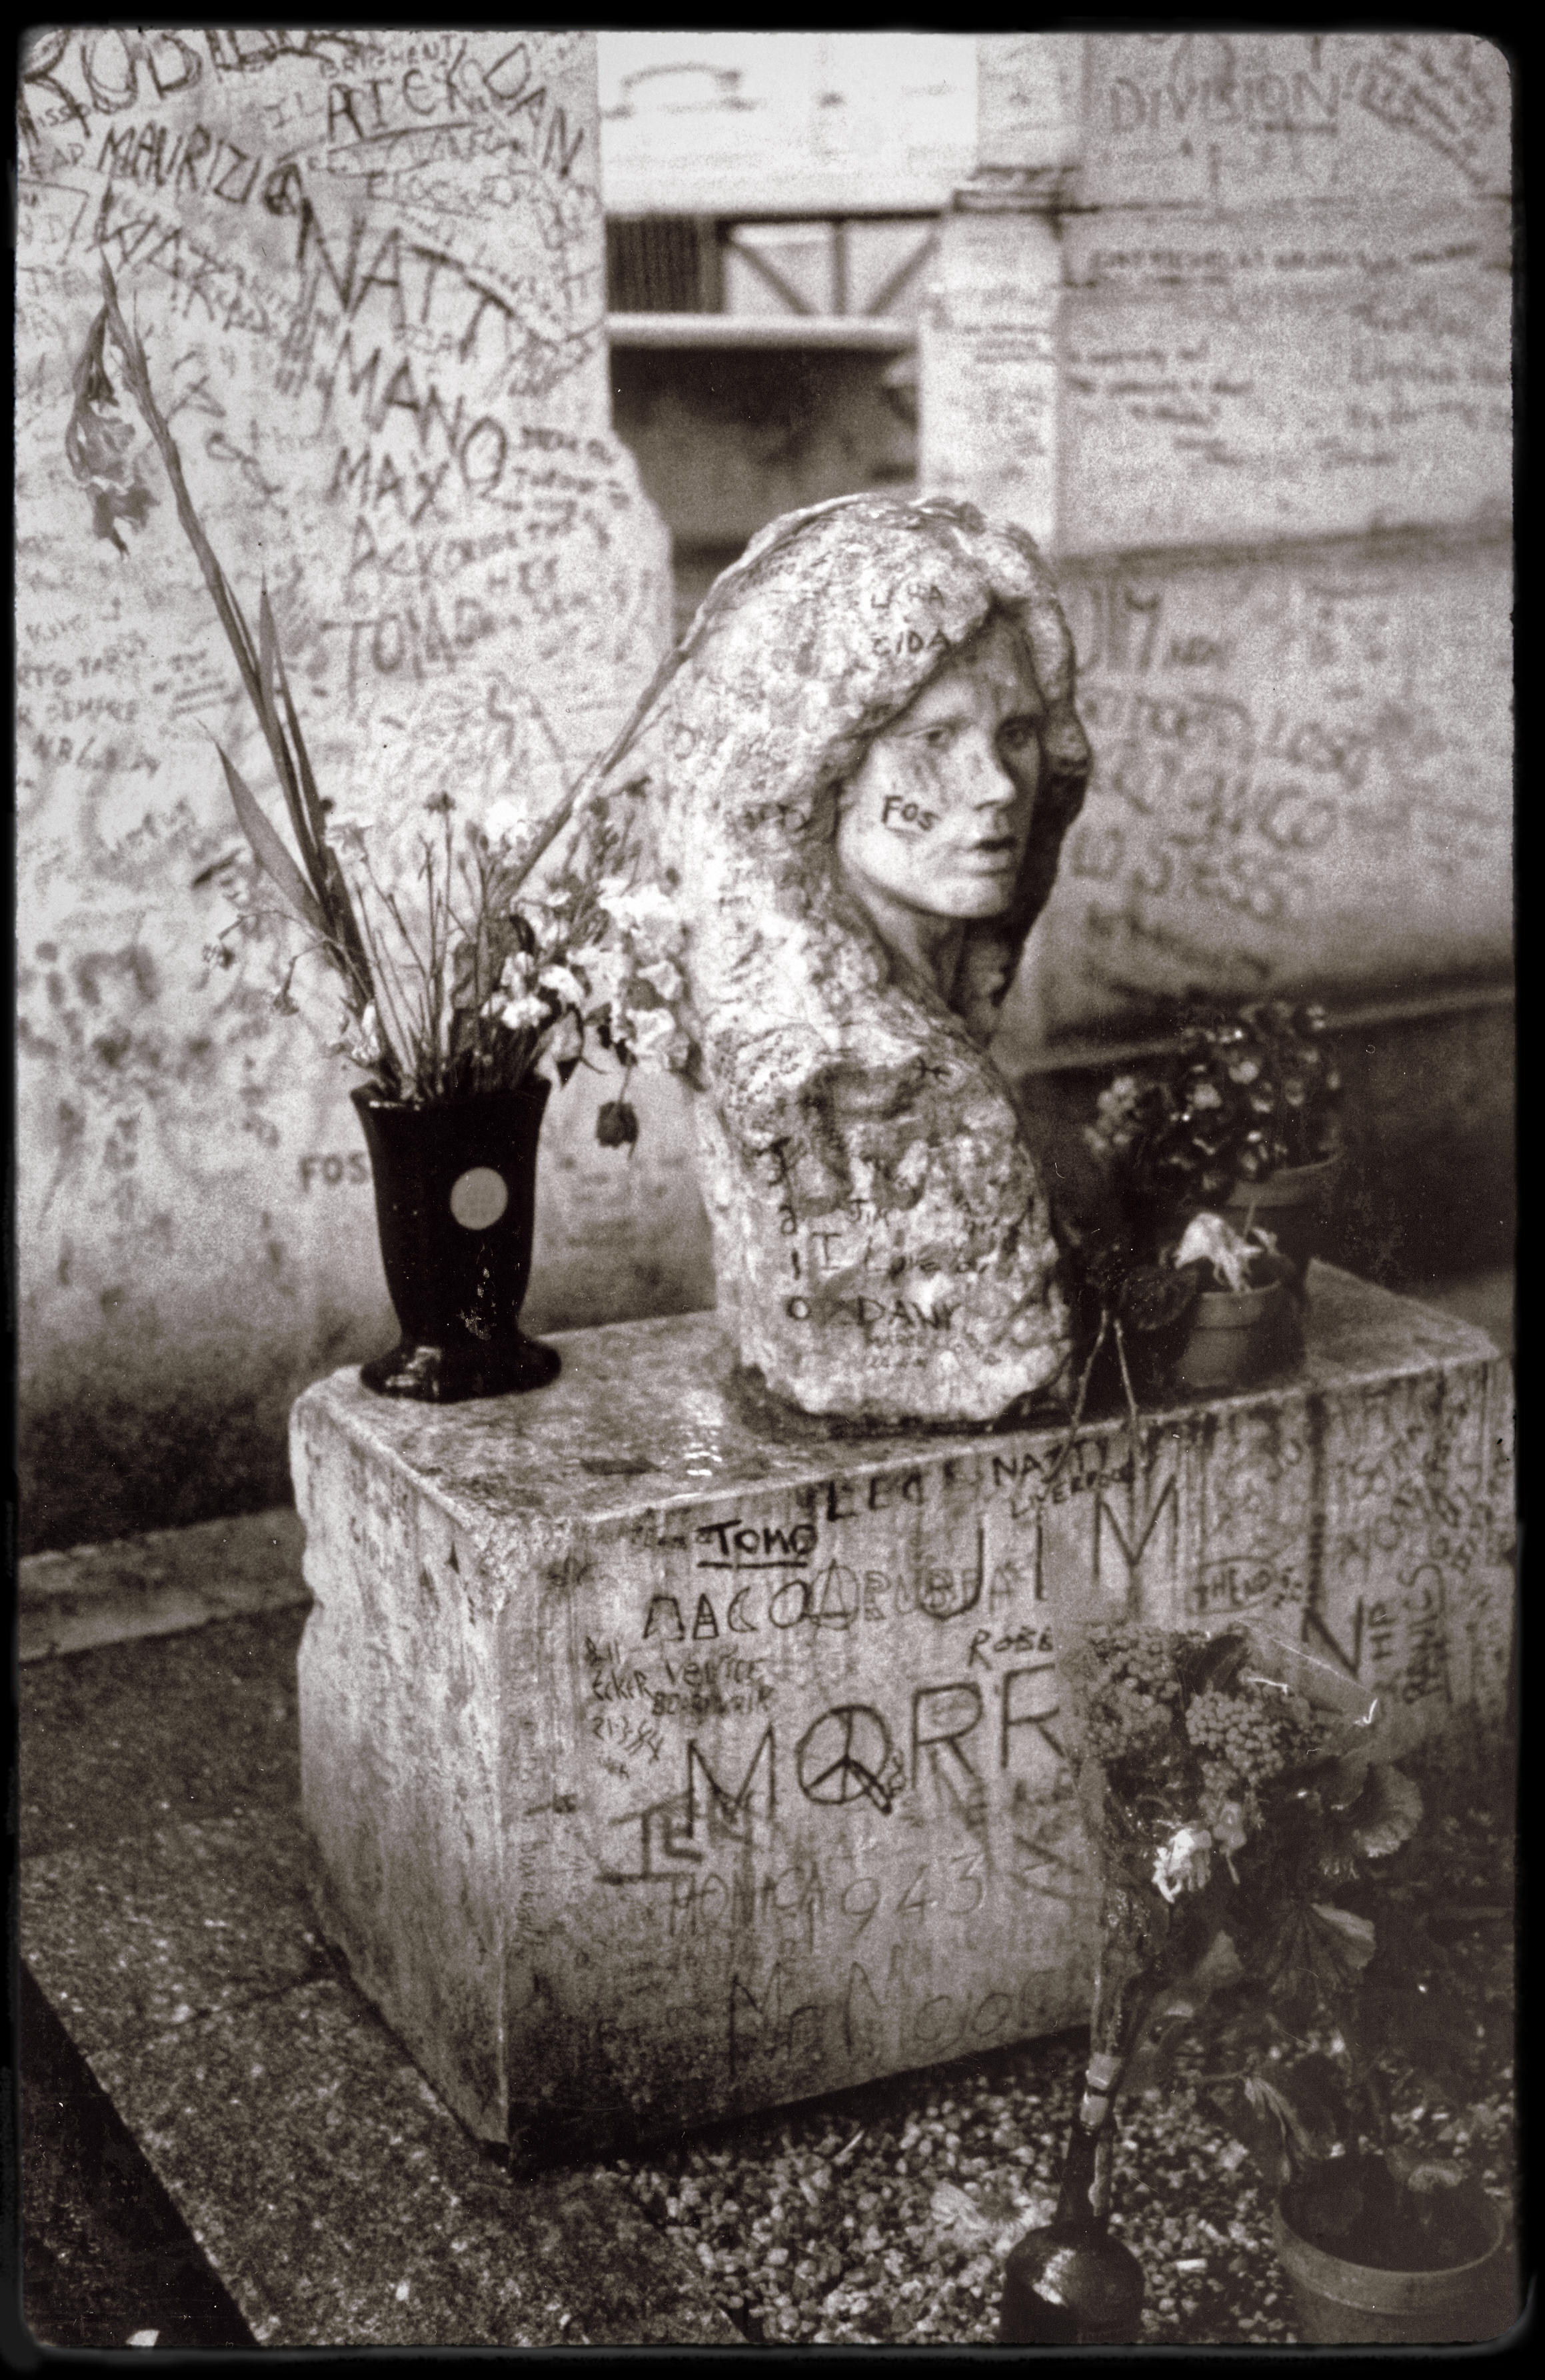
One of my reasons to visit that cemetery was to see the final resting place of Jim Morrison:


So what do I think of software manipulation of photos to give them an antique or historical look? Well it is kind of fun and I’ll probably play around with it a bit more, particularly on old, low quality images. I’m not trying to fool anyone but if the look of the photo contributes to the mood conveyed by the image and that helps tell the story then I think the historical treatment is valid.
A Kick in Your Creative Pants
Do you ever find yourself wanting to ( perhaps even needing to) do something different with your painting – but are feeling blocked, just unable to get started? One solution may be as near as your smartphone.
Specifically I am suggesting that you use some common photo apps with built-in transformative filters. Take a standard image and then apply a filter or six to see what happens. I’m not suggesting just painting the transformed photo but you might start off that way and once you creative juices are flowing, use that first painting as a jumping off point for a second.
These are some variations I came up with using the Cameraringo app on my Android device:


To me each of these variations suggests a different approach/media/color palette that I could use, and once applied to one image I’d likely carry the idea across to a little series.
Incidentally, here is the original image that spawned the five variations shown above:

A Studio to Call your Own – Reminiscing
A year ago I was packing up the studio that I’d called “my space” for 16 months. It was hard. I came to the reluctant decision that I had to move out of lovely studio space.
It was May of 2014 when I noticed a sign on the outside of a historic (over a century old) building in downtown Edmonton, a comfortable half hour walk from my home.

Studios were located on the 3rd and 4th floors, in a variety of sizes. I was able to get a very generous space of over 400 square feet. That amount of space was very beneficial to me. Of course it meant that I didn’t have to clean up after every creative session, packing away wet materials and works in progress. It meant that I could set up separate work spaces for my two main painting medias: oil and acrylic.

First into the studio space – my oils
The space gave me room to get, and keep, organized. A set of shelves, behind my work table and next to an easel were dedicated to my acrylic paints and media.

Acrylics Shelf
A similar set-up of shelves, table and easel on the other side of the room was dedicated to oils:

Studio Divided
The space allowed me to work larger than I had been. Canvases of 3 by 4 feet (90 by 120 cm) became my standard and I assembled some even larger stretchers (but never did get around to putting canvas on them).

Big Stretchers
Even with the two work spaces, I still had lots of floor space to use when I needed to paint on the floor, to build stretchers or for varnishing.

Paintings on the floor for varnishing
In the end it was time to retreat to a much smaller home studio, disassembling shelves and stretchers and hauling out many carloads of supplies and many mostly-completed paintings

Packed up and Ready to go
And in the end that highly creative space reverts to just a space.

The Final View – Empty Studio (like in the beginning)
A year later I can see ever so clearer how important that space was. Although I do have some space at home that I am re-converting into a working studio, progress has been very slow. I didn’t paint at all for half a year. Finally I cleared out a little space and created 3 works. Now I am back into re-organizing mode that will hopefully give me room for a couple of easels and two distinct little work areas (one for acrylics and one for oils, with a third, a small table for pastel work).
The other important function of that studio space was storage. I had lots of space for materials – for stretcher bars and canvas rolls, for primed canvases and boards, for paintings in various states of progress, completed works awaiting varnish and framing and exhibition-ready pieces. Now I have all these things stored around my house in different rooms, paintings stacked up, eight deep, against walls and bookshelves. My ultimate goal is to make my studio space just a working space – the storage issue is a whole other problem that I will have to address. I suppose someday it will all come together …
Plein Air en Velo
I’ve always felt that plein air painting is the ultimate but I’ve never done enough of it to really feel comfortable. Hopefully that will change now that I’ve outfitted myself with equipment that allows me to take-off on my mountain bike with my painting gear. While riding around the river valley here in Edmonton I’ve often noticed views that cried out to be painted. Until know I have had to be satisfied with taking a quick reference photo and then working up a painting in the studio.
The first piece in the puzzle was the pochade, a self contained studio-in-a box. I have long heard of the Guerrilla Painter line of plein air boxes and after much deliberation decided to go with their 9 x 12 inch pochade. I wanted something as big as possible but it had to be small enough to carry on my bike. That meant I had to face the limitation of the bike bag (pannier) that I would use. At first I did not think I’d be able to find a bag to accommodate the 9×12 box and so had been thinking I’d have to go with the 6×8 box. But I did find a pannier at Mountain Equipment Co-op (MEC) that I thought would work – but it didn’t. Even though the dimensions of the bad were adequate the opening at the top was just a tad too small – the bag wouldn’t stretch and the wooden box can’t compress to fit through the opening. I returned that bag and picked up another one (the Urban Shopping Tote) which had a large top opening and ample room inside (not only for the pochade box but also for my collapsible stool).

Guerrilla 9×12 Painting Box

Stool, Pochade and Pannier

Pannier on rack with Pochade and stool inside
It looks like the bike may be side-heavy with the bag/box on just the one side but I noticed nothing unusual in the bike handling as I was riding. I set off down the bike paths and then dirt trail within Edmonton’s river valley arriving at a place about 10K from home that I had long wanted to paint. It is a little pond set on a flat section, half way down the river bank.

my painting scene
Having picked my scene, I got set up to paint. The pochade and stool came out of my bike bag easily and set up quickly.

- Bike and painting gear on location
I had decided, for this first test run, not to use a tripod to support the pochade box since I’d prefer to travel light and not to have to carry a tripod. One thing I quickly discovered was that I couldn’t just support the pochade on my lap. I ended up sitting on my stool with one leg crossed up over the other to give me a more stable platform. This worked reasonably well but was not the most comfortable position and it did not allow me to easily back away from the painting to get the big picture of how it was coming along.

The scene sketched in
At one point I did put the pochade upon my stool so I could back-up and take a look. Another lesson was learned at that point. The stool is not the most stable thing.

A moment to admire
As I got a few paces back, I saw not only my painting and the inspirational scene but in slow motion, I watched as the stool collapsed and my pochade box fell and dumped its contents at the edge of the pond.

Oops!
Fortunately there was no damage – the canvas stayed in the lid and none of my paints or other equipment actually hit water. I picked everything up and put the finishing touches on my painting.

the “finished” sketch (9×12″, oil on canvas)
I am already looking forward to my next plein air excursion on the bike. I will take along a tripod to hold the pochade box and also will experiment with different clothing, that might be a bit better for both cycling and painting.
Value Viewer – revisited
A while back I reviewed a handy little iPhone app called ValueViewer. It helps artists (especially plein air painters) to see, to simplify the number of values (white, grey, black) in a scene. I liked the concept but thought that the original app had some serious flaws – primarily that one couldn’t save the image that the app produced.
On April 20th, 2012, version 2.1 of ValueViewer was released. It is a winner! One can now open any image from the iPhone camera roll (or take a new photo on the spot) and most importantly save the modified image back to the camera roll. From there the image can be uploaded to a computer and printed out. This is of great value to me for generating a reference print to use in the studio.
The user interface is a bit different from the original version and maybe not quite as intuitive but with the built in Help info and a bit of practice I think it will be fine.I like that one can flip from portrait to landscape format, adjust the window to any standard canvas size and to zoom in or out with simple finger action.
My only complaint is that one can not select the number of levels displayed. You can select gray scale (“infinite” levels), Notan (two levels: black and white) or three levels (white, gray and black). I would like to be able to choose, say 5 or 9 levels. The app does allow one the flexibility to adjust the mid-point on the value scale and the range of the gray region.
In conclusion, this version (2.1) of ValueViewer kicks the app up to the “very useful and recommended” level.
ValueViewer – A Handy App for Painters?
I recently discovered and purchased the ValueViewer App for the iPhone. This app was endorsed by PleinAir Magazine so I figured it would be good. The premise is very good – take a photo of a scene with your iPhone camera then let the app break it down into a few values (lights and darks) so that you can rough-in the appropriate values to start a painting. Getting the values right, from the start, is a very important part step for producing a representational painting. The basic functionality of the app does allow you to capture a scene, break it down into 3 values and allows you to play around with the composition by zooming in on the image and cropping it to one of 3 common canvas/frame proportions (3:4, 4:5 & 11:14).
However, beyond the basics there is not much to this app. The following shortcomings quickly become obvious:
- can’t save the grey-scale image (so you can’t upload the image or print it)
- only 3 values (black, white and grey). I would like to see it selectable to 5, 7, 9 or 11 values
- only 3 set frame sizes (no ability for user to define others) and
- you can’t toggle between portrait and landscape orientations
I do like that there are 7 setting that allow one to adjust the scene for high or low key image. That is you can choose a 2-scale image (mainly black with a bit of grey or mainly white with a bit of grey) or five 3-tone (different proportions of black, grey and white) between these extremes.
So overall this app show promise but I’m afraid it’s not really ready for prime time – certainly not at a $4.99 price. In the current version (version 1.1 released 2011 July 22) I’m not even sure it would be up to the value of other 99 cent apps. The ad in PleinAir magazine does promise “more features coming soon” and it was on the basis of that promise that I made my purchase, to show support and provide encouragement for the developer to take this app to where it should be. It could be a very handy tool for painters working en plein air or in the studio.
Addendum: a new version (2.1) of this app was released in April 2012 – see my thoughts here.
Color Matching
Being able to match the color you see, with the pigment in a paint tube is a major challenge for many artists. One tool that can help one develop that eye- brain connection is Magic Palette Color Matching Guide from The Color Wheel Company.
The Magic Palette Color Matching Guide consists of 36 cards, one for each of 36 very common artist’s colors. Each card has a sample of the main pigment and 4 tints or shades of that color. The number of tints and shades depends on the relative value of the pure color. With Cadmium Yellow Light, for example, the card contains three shades and one tint. Many of the darker colors, such as Ultramarine Blue have no shades, just the four tints.

Color Matching Guide
There is a square hole in each color sample so you can hold the card up to the real color and check how close the match is. Of course this tool is only based on one color and in reality a real color may be a mix of two or more hues – still this tool should get you close enough to where you can say ” a little more red”, “a bit warmer” etc. to get the perfect match (if that is critical to you).
I intend to play a little game using this tool, by challenging myself to name the hue that I think I am seeing and then use the guide to confirm if I am correct or close. Have any of you used this tool or any thing like it?


